Painting Subjects
Painting Skies in Watercolor
Paint watercolor skies with confidence: building a graded base, lifting clouds, keeping light in the horizon, and reading the sky before the paper is wet.
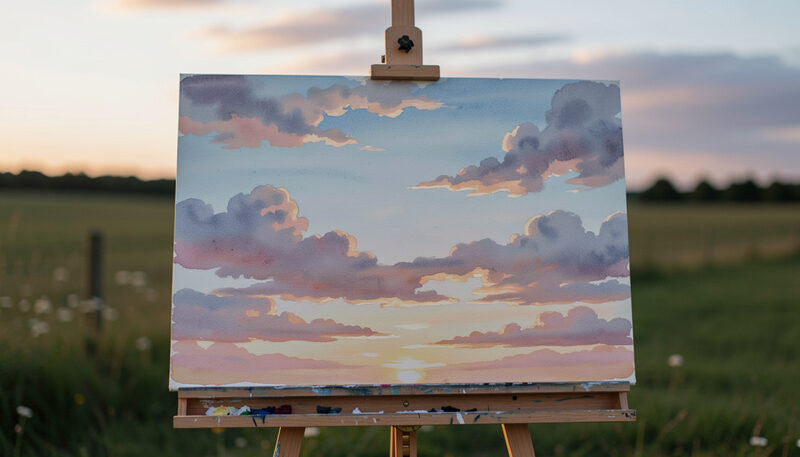
The sky is the largest and lightest area of most landscapes, and it is painted first. Because it covers so much paper and uses so much water, it sets the mood of the whole picture and decides the color of every layer that follows. A confident sky is built from a graded wash and a few lifted clouds, and it is easier than it looks once the order of operations is understood.
Why the sky comes first
Watercolor is painted from light to dark, and the sky is the lightest passage, so it is laid down while the paper is clean and fresh. Any part of the sky that is meant to stay white, a bright cloud or the glow at the horizon, is left as bare paper from the start, because it cannot be recovered once covered. Painting the sky first also fixes the color of the light, which everything below must then agree with.
Reading the sky before you paint
Spend a minute looking before mixing any paint. Note the direction of the light, the color at the top of the sky against the color at the horizon, and the shapes of the clouds. A clear sky is usually deeper and cooler overhead and paler and warmer near the horizon. A changeable sky has clouds with soft tops and harder undersides, because the light is behind them. This short reading tells the painter where the wash should be dark and where it should fade.
A graded base
Mix a generous puddle of the sky color, usually a blue with a touch of red to keep it from looking raw. Wet the paper evenly with clean water, or work wet-on-dry for a crisper result, and lay the color across the top of the sky. Add clean water to the brush and continue downward so the wash fades toward the horizon. Tilt the board slightly so the color runs gently down. Work across the whole width of the sky without going back, and stop before the horizon so the lightest band is left. This base is the sky; the clouds are what is taken out of it or added to it.
Soft clouds and hard clouds
Soft clouds are lifted, not painted. While the wash is still damp, a clean, barely moist brush or a tissue is used to take color out, leaving a pale, indefinite shape with soft edges. Hard clouds are painted on top of a dry sky, or their undersides are darkened with a little warm gray while the surrounding wash is damp. Distant clouds are softer and lighter than near ones, which is what gives depth to the sky. A single sky usually has both kinds.
Lifting and reserving light
Light in a sky comes from two places: paper left white, and color lifted out. Lifting works best while the surface is damp, because once the pigment stains and dries it will not come back. A damp brush pressed gently and lifted, without scrubbing, removes a soft amount of color. Repeated lifting in one place will damage the paper, so the painter plans the main areas of light in advance and reserves them as paper.
The horizon and distance
The horizon should be the palest and often the warmest part of the sky, because the air is thickest there and the light is strongest. Keep the wash light near the horizon and let it darken upward. Just above the horizon, a faint warm band, a little yellow or pink, suggests the glow of the sun without painting it. If the sky meets distant hills, the hills are painted after the sky is dry, in pale, cool, simple shapes that sit behind the nearer landscape.
Weather and mood
The sky carries the weather and, with it, the mood of a painting. A high, pale sky with small clouds reads as a clear, calm day; a low, heavy sky with a dark band at the horizon reads as coming rain. The painter chooses the sky to match the story of the picture. A storm sky is built from a deep, cool wash with the light reserved as a break in the clouds, and the land below is kept dark so the light in the sky is the brightest note. A summer sky is high and blue, graded gently, with only a few soft clouds. Reading the weather before painting keeps the sky and the land in agreement.
A sky built in four steps
First, decide the light and reserve the brightest areas as paper. Second, lay the graded base, dark at the top and pale at the horizon, and let it dry. Third, add the cloud shapes, lifting the soft ones while the base is damp and painting the harder ones on the dry surface, keeping the undersides darker than the tops. Fourth, deepen the top of the sky and any cloud shadows once everything is dry, using a thin glaze so the light still comes through. Working in these four steps keeps the painter from the common trap of adding detail to a sky that only needed light.
Common sky faults
The usual faults are a flat, even sky with no gradation, hard-edged clouds that look cut out, backruns from returning to a drying wash, and a horizon that is too dark. All of them are timing problems, and all are covered in the troubleshooting guide. A painter who practices graded washes on spare paper, as shown in the wash guide, will find the sky becomes the easiest part of the painting rather than the hardest.